Introduction
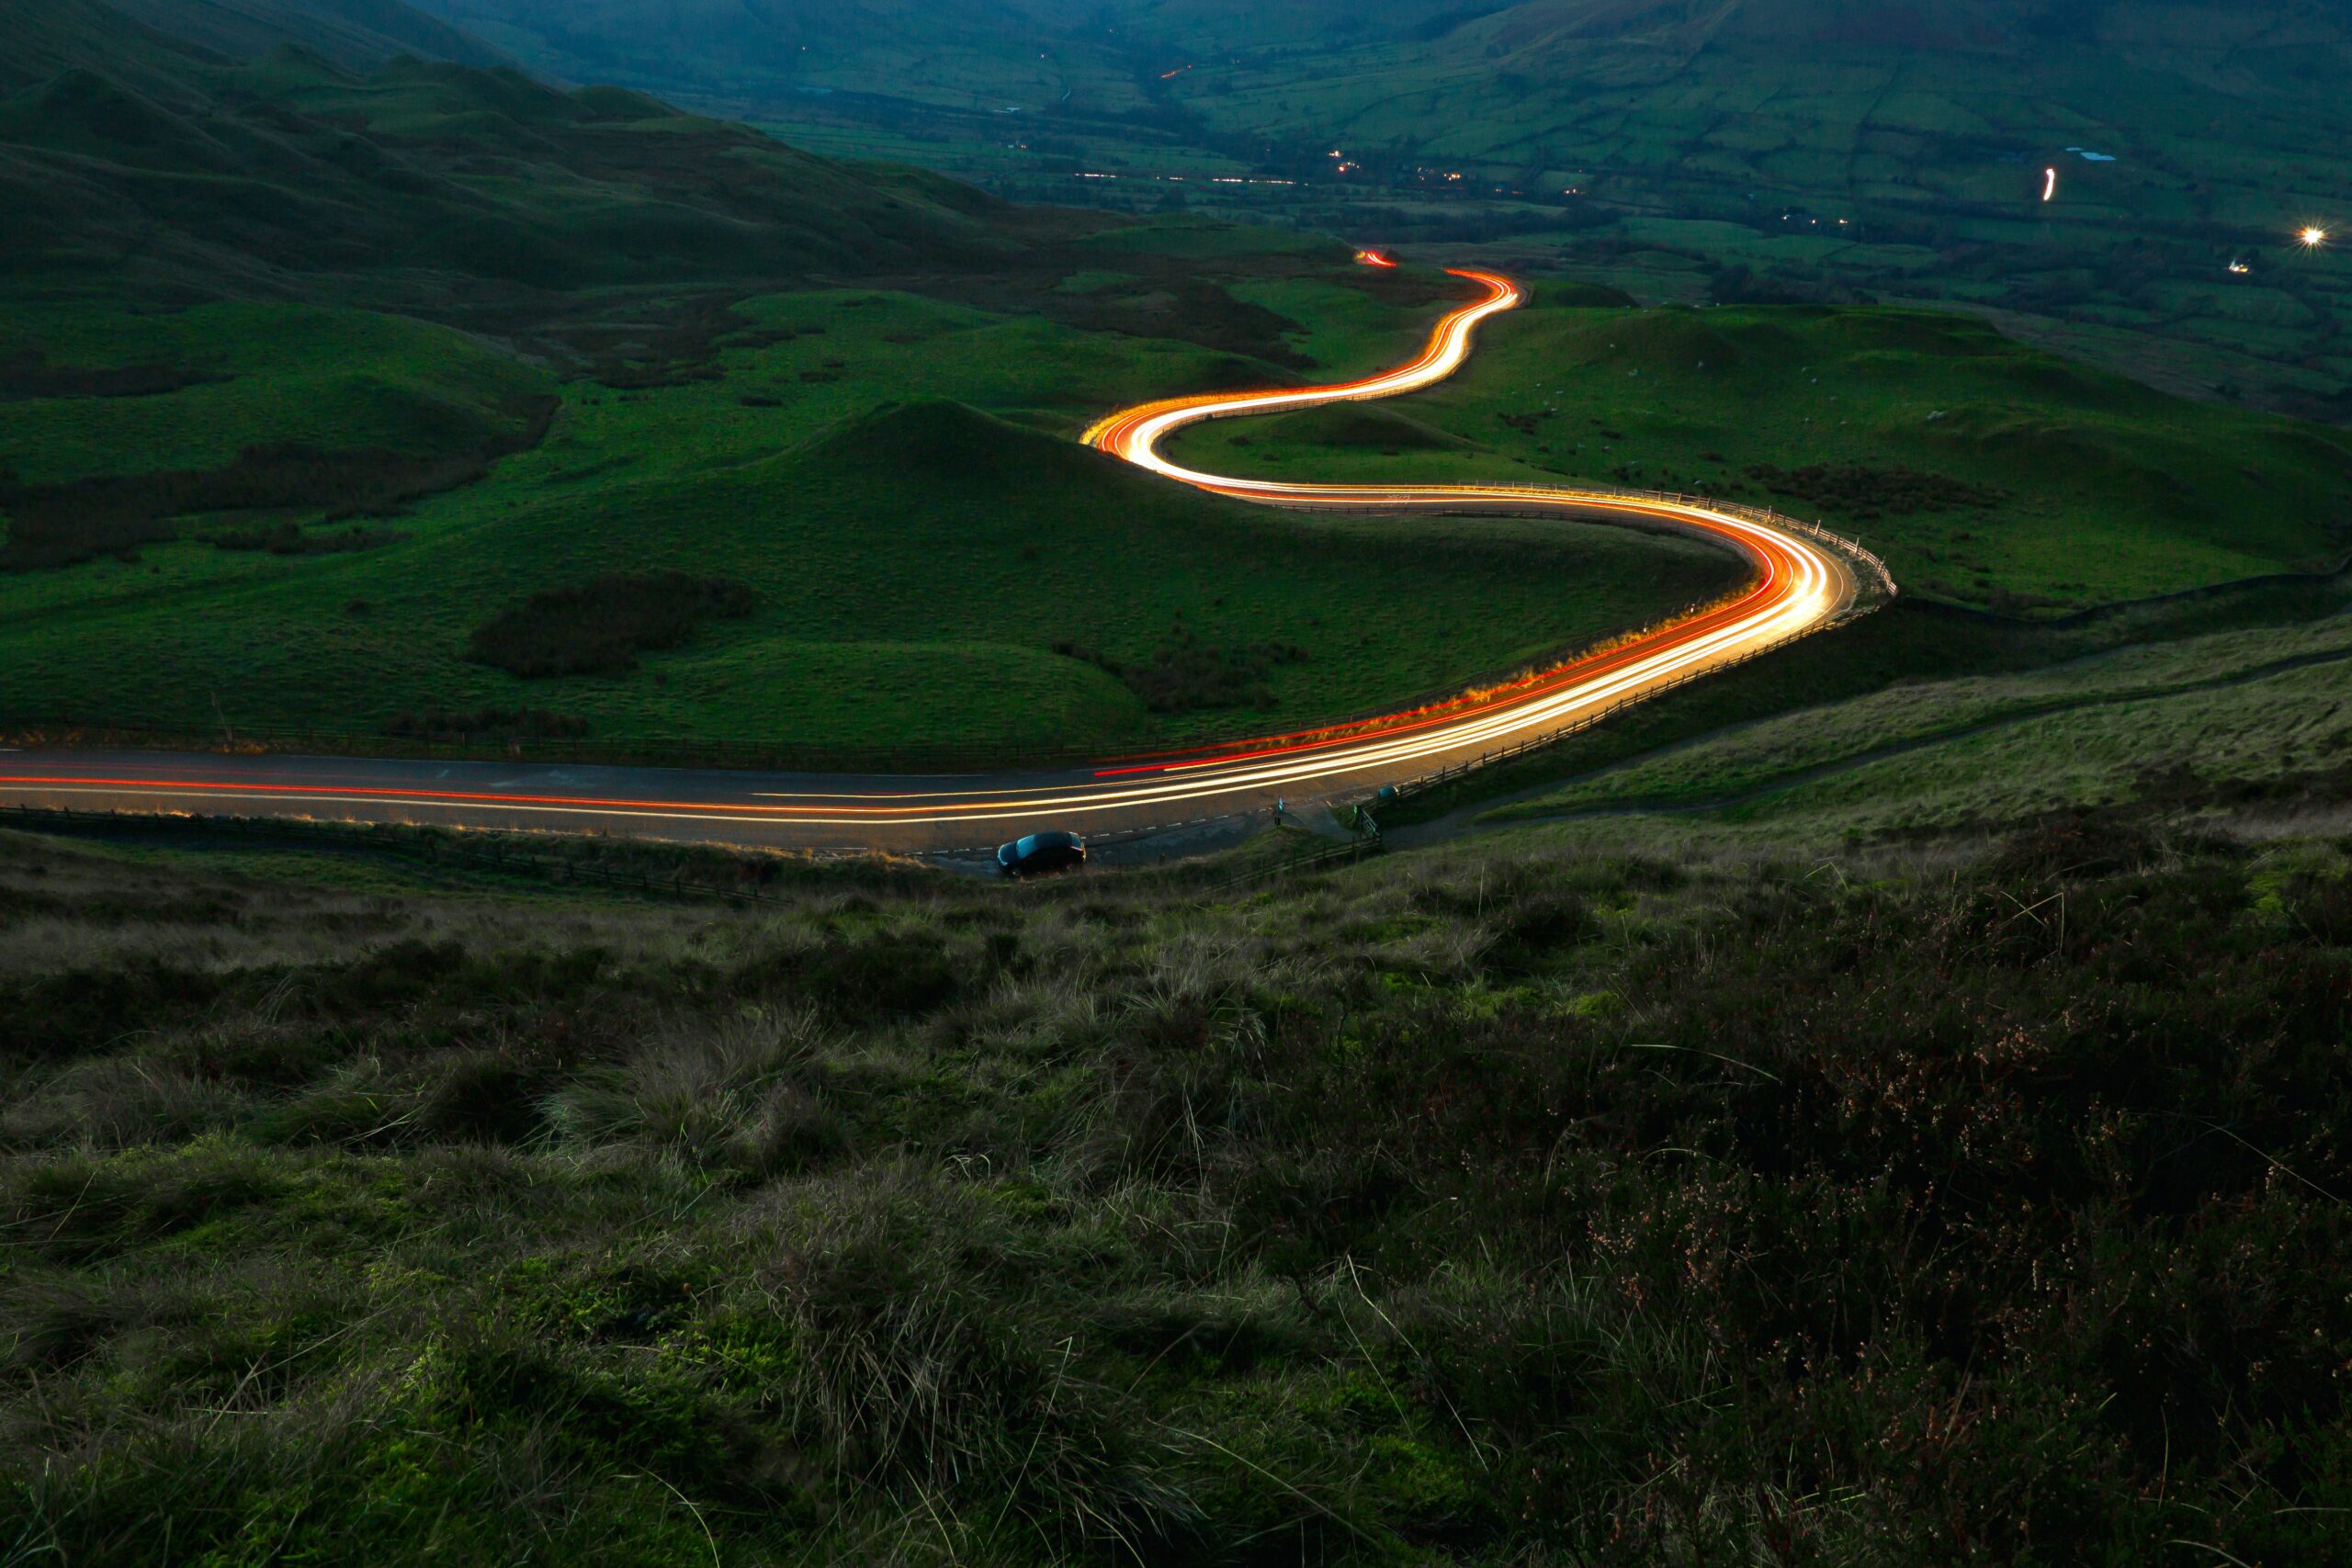
Dusk, with its soft and enchanting light, often serves as a muse for photographers. One particularly mesmerizing aspect of capturing this transitional period between day and night is the play of light and darkness, especially when combined with a scenic landscape and a long exposure technique. In this beginner’s guide, we will explore how to recreate a stunning landscape photo taken at dusk, featuring a road as the central element and a car passing through, leaving a trail of light in its wake.
Long exposure landscape photography at dusk demands the right gear, techniques, and patience. We’ll walk you through the process step by step, from choosing the right equipment to composing your shot and mastering the art of long exposure.
Gear You’ll Need
Before we delve into the nitty-gritty of capturing that perfect dusk shot, let’s start with the essential gear you’ll need. While professional photographers often have an extensive list of equipment, as a beginner, you can achieve incredible results with a more modest setup:
- Camera: A DSLR or mirrorless camera with manual mode is essential. These cameras allow you to have full control over settings like aperture, shutter speed, and ISO.
- Tripod: A sturdy tripod is indispensable for long exposure photography. It will keep your camera steady during the extended exposure times required at dusk.
- Wide-angle Lens: A wide-angle lens (typically 16-35mm) is perfect for landscape photography. It allows you to capture more of the scene and provides a greater sense of depth.
- Remote Shutter Release: While not mandatory, a remote shutter release can further reduce the risk of camera shake during the exposure.
- Neutral Density (ND) Filter: An ND filter helps control the amount of light entering the lens, allowing for longer exposures without overexposing the image.
- Sturdy Backpack: Carrying your gear safely and comfortably is vital, especially if you’re venturing into remote locations.
Now that you have the right equipment, let’s dive into the process of recreating that breathtaking dusk landscape photo.
Choosing the Right Location and Time
The first step in creating your dusk masterpiece is selecting the perfect location and time. Here’s how to do it:
- Scout Locations: Explore your area to find a suitable location with a captivating landscape. Look for roads that stretch into the distance, leading the viewer’s eye through the frame. Consider bodies of water, mountains, or cityscapes for added visual interest.
- Plan the Timing: Dusk, the period right after sunset, is an ideal time for this shot. The fading natural light blends seamlessly with the car’s headlights and taillights, creating a magical atmosphere.
- Check Weather Conditions: Keep an eye on weather forecasts. Clear or partially cloudy skies are preferred, as they provide dramatic lighting and vibrant colors during dusk.
Setting Up Your Camera
Now that you’ve chosen your location and the perfect time, it’s time to set up your camera. Follow these steps:
- Attach Your Wide-Angle Lens: Mount your wide-angle lens on your camera, allowing you to capture more of the scene.
- Set Your Camera on the Tripod: Attach your camera securely to the tripod to eliminate any chance of camera shake during long exposures.
- Set Your Camera to Manual Mode: Switch your camera to manual mode (M) to have complete control over the settings.
- Adjust Your ISO: Begin by setting your ISO to its lowest value, typically 100 or 200, to reduce noise in the final image.
- Select Aperture: Choose an aperture setting between f/8 and f/16. These settings provide a good balance between depth of field and sharpness.
Mastering Long Exposure
The magic of recreating a dusk landscape photo with a car’s light trail lies in the long exposure technique. Here’s how to do it:
- Enable Mirror Lock-Up (if available): If your camera has this feature, enable it to minimize internal vibrations caused by the mirror’s movement.
- Attach the ND Filter: Screw the ND filter onto your lens to reduce the amount of light entering. The strength of the filter will depend on the available light and your desired exposure time.
- Set Your Shutter Speed: For a classic dusk shot with a car’s light trail, start with an exposure time of 20-30 seconds. Adjust it as needed, depending on the ambient light and the desired effect.
- Use the Self-Timer or Remote Shutter Release: To avoid camera shake when pressing the shutter button, use either the self-timer or a remote shutter release.
- Focus Manually: Autofocus may struggle in low light conditions. Instead, switch to manual focus and set your focus point to a distance that includes the road and the surrounding landscape.
Composing the Perfect Shot
Now that you have the technical aspects under control, it’s time to compose your shot. Here are some tips for a captivating composition:
- Rule of Thirds: Compose your shot using the rule of thirds, aligning key elements like the road, car, and horizon along the gridlines or their intersections.
- Leading Lines: Use the road as a leading line, guiding the viewer’s eye through the frame towards the horizon or other points of interest.
- Include Foreground Elements: Add depth and context to your photo by including foreground elements like trees, rocks, or signs.
- Balance the Frame: Ensure the composition is balanced, with the car’s light trail forming a harmonious element within the frame.
Taking the Shot
With everything set up, it’s time to take the shot. Here’s a step-by-step guide:
- Compose the Frame: Look through your camera’s viewfinder or LCD screen and compose your shot according to the tips mentioned above.
- Focus: Double-check your focus point and make any necessary adjustments. Ensure the road and surrounding landscape are sharp.
- Lock the Mirror (if available): If you enabled mirror lock-up, lock the mirror before taking the shot.
- Use the Remote Shutter Release or Self-Timer: Activate your remote shutter release or self-timer to trigger the shot without touching the camera.
- Start the Exposure: Press the shutter button and allow the camera to capture the scene for the predetermined exposure time. During this time, the car will pass through, leaving its light trail.
- Review and Adjust: After the exposure is complete, review the image on your camera’s LCD screen. If needed, adjust your settings and reshoot until you achieve the desired effect.
Post-Processing and Final Touches
Once you’ve captured your long exposure dusk shot with the car’s light trail, it’s time to bring it to life in post-processing. Here are some final touches to consider:
- Import Your Photo: Transfer your photo to your computer and open it in your preferred photo editing software.
- Adjust Exposure and Contrast: Fine-tune the exposure and contrast to bring out the details in your image.
- Enhance Colors: Use color correction tools to enhance the colors, especially during the magical dusk period.
- Remove Unwanted Elements: If necessary, remove any distracting elements from the photo using the cloning or healing brush tool.
- Sharpen and Fine-Tune: Apply sharpening and noise reduction as needed to ensure your image is crisp and clean.
- Crop and Straighten: Crop and straighten the image to improve the composition and remove any unwanted distractions.
- Save Your Masterpiece: Once you’re satisfied with the final result, save your photo in the desired format and resolution.
Conclusion
Recreating a landscape photo taken at dusk, with a road as the focal point and a car leaving a mesmerizing light trail, is a rewarding experience for any beginner photographer. Armed with the right gear, techniques, and a passion for capturing the magic of twilight, you can create stunning images that evoke a sense of wonder and awe.
Remember, practice makes perfect. Don’t be discouraged if your first attempts don’t yield the results you envision. Experiment with different settings, compositions, and locations until you find your unique style and achieve the perfect dusk landscape photo. So, grab your camera, head out to your chosen location, and let the beauty of dusk inspire your creativity.
Are you looking to start from scratch with your photography journey? Check out Photography for Beginners: The Ultimate Guide (2023)
Happy shooting!
1 thought on “Tutorial: Long Exposure Landscape Photography (2023)”